Background
The X45e units and the Parameter Setting Tool are interacting in two different modes. The difference between these are if the parameter values are stored in a configuration file or not. Direct mode is the name of the interaction mode where there isn’t any file to store the value and configuration mode is the mode where all values can be save in a backup file. This article focuses on how to work in this configuration mode.
For deeper information please check the following manuals:
- User documentation – Electrical System (X45e)
- User documentation – Parameter Setting Tool
Prerequisites
Hardware
- PC (Windows 7 or later)
- X45e units (with power cables)
- Parameter Setting Tool cable (X45e) or mini USB cable depending on hardware version
Software
- X45e – Parameter Setting Tool
Offline-preparation
When working with the x45e unit in a project it could be useful to store all parameter data in one file. This file is called the configuration file and has the format of “.flpst”. This file is exactly the same format as a backup file of one unit but could contain the complete network. In larger project where more than one network exists there must be one configuration file for each network. The idea with configuration files is closely related to networks but it can also be applied in projects built up by only stand-alone units. Still, all units has have unique node address.
File menu
The File menu contains the following configuration commands:
- New configuration… (CTRL+shift+N)
- Open configuration… (CTRL+O)
- Save configuration (CTRL + S)
- Save configuration as… (CTRL + shift + S)
- Close configuration
The configuration mode is triggered either by the Open configuration… or the New configuration… commands. This is indicated by the Parameter Setting Tool by printing the configuration file including the folder path as the picture below shows.

There is also a support for reusing configured nodes.
- Export node…
- Import node…
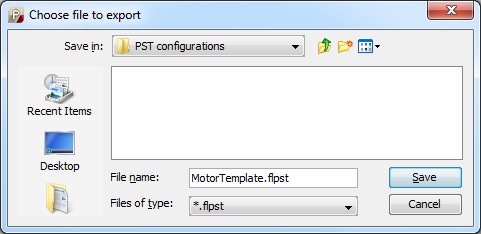
One unit in the configuration could be used as a template when adding new nodes. When the node is configured it could be selected and the Export node… command saves this node into a new configuration file only containing this node. The name and location of this file has to be specified.
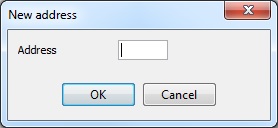
Later when this node is to be used as a template for adding a new node the command Import node… is used. After the file to use is chosen the address for this new unit has to be specified. All other parameters expect the node address is reused. This procedure can be repeated as many times as required.
Edit menu
The Edit menu contains some commands for editing a configuration.
- New node… (CTRL + N)
- Change node… (CTRL + E)
- Move left (CTRL + L)
- Move right (CTRL + R)
- Delete (CTRL + D)
- System picture…
It is important to point out that the command Change node… is first of all changing the selected configuration file data. But if a real node is connected it is automatically updated with these new parameters. The move command is only changing the position of the selected node in the node pane. The delete command removes the selected node from the configuration.
It is possible to connect a system picture to the configuration. When the System picture... command is triggered a new window shows commands to both select a new picture and delete the existing one. The system picture is only visible when no node is selected.
- Select picture…
- Clear picture

Online interaction
Scan network can't be used in configuration mode. Instead the Verify network command checks the connected unit with the configuration file. All found nodes are colored with either green, yellow or red. the different colors represent the status of the software. See User Documentation for further details. If the Parameter setting Tool is set to B-bus or USB communication only one node is shown and this node is automatically selected.
The picture below describes how the parameters flow for all commands in the Parameter Setting Tool. Value is the most used column where the user can change parameter values. The Network column is the view of the real status in the nodes. The Config column is the mirror of the configuration file.

All the actions described below are only performed on the selected node.
- The Read button reads all parameters from the connected node and writes these to both Network and Value column.
- The Write button stores all parameters from the Value column and first updates the connected node, then the Network column.
- The Open command takes all parameters from the configuration file and updates the Config column.
- The Save/Save as... command stores all parameters in the Value column into the configuration file. The Config column is also updated.
- The Restore command (from the Action menu) overwrites the Value column with the Config column, which is a mirror of the configuration file. This is useful when the Value column is updated either through Read operations or by user input, and the original parameters is to be used instead.
When changing the parameters on the nodes in a configuration there are three different ways. The Read command updates the current node with the values from the connected node. The Change node... command set a complete new parameter setup on that node. Last the user could write new values directly in the Values column for a specific node. It is very important to mention that all these changes are only done in the Value column and are not stored permanently until the Save or Save as… command.