The element module is probably the most important module in the Quotation Tool.
This is where you add all your items that is the base for calculations.
And there's a lot of functions to help you out, some of them might not be that obvious, this article describes a few of them.
Comparing content of two tabs in two separate elements
If you want to compare the content of two tabs in two elements use the "view in separate window" function. Right click in the data grid (sheet) of the tab that you want to load into a separate Window (works with FlexLink material, non Flexlink material, hours and expenses), select "view in separate window" in the context menu and then navigate to the element that you want to compare it to.

Comparing the summary of two element (trees)
Either you can open up two instances of the quotation tool and load two different files (or the same file) in both instances. Another alternative is to use the Print element summary (found in the file menu). Select the tree that you want to compare (the top node), click on the Print element summary. The summary is now copied into Word and you can select another tree that you want to compare with.
Searching for items
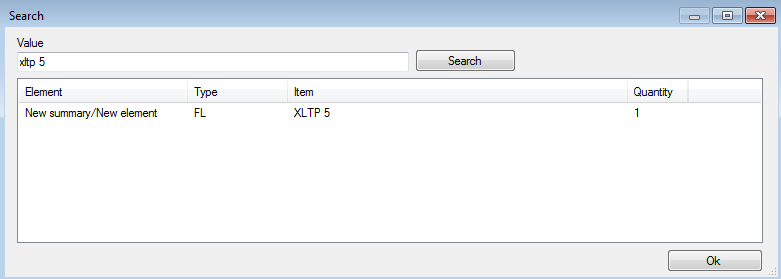
If you have a really large quote (with lots of items) it might be difficult to locate a specific item. Press CTRL+SHIFT+F to display the Search dialog.

Enter the item no/name/description of the item that you're looking for and press "Enter" (or the Search button).
The application will search through all your elements and display them in the the list.
The Type indicates what type of material it is (FL=FlexLink, MAT-E=Controls, MAT-M=Mechanical, MAT-P=Pneumatical, MAT-I=Installation).
You can double click on the row to have the application load the element containing the item.
Creating an element database
Re-usability is probably the strongest selling point of the Quotation Tool.
Using the Export to file function you can easily create a library of elements that can be reused of shared with colleagues.

Just right click on an element (top or sub) and select Export to file. The element with all its content an any sub element attached to it will be exported to file. The application will update all prices according using the values from the database once imported again (please note that only items that exists in the database will be updated).
Any data found in the element will be included in the export (including FlexLink material, Non FlexLink material, hours, expenses and trips).
To import the element just right click on the element where you want to import the data and select Import from file (from the context menu). If the element you've selected is a sub element you can either merge the data found in imported element or create a new sub element (below the selected one).
This way you can create a library of "modules" can be reused in your future quotes. If you put the exported files on a network drive even your colleagues will be able to use them in their quotes.